DIY Hall Tree/Entry Bench
Five years ago (I truly can’t believe it’s been that long!), I decided to DIY a hall tree for the open wall by our back door. Before I made it, everything was just dumped on the buffet or dining table as people walked in the door. Now, there’s a place to sit and put on shoes, hang our coats, purse or keys, and a place to store my youngest two kids’ shoes!

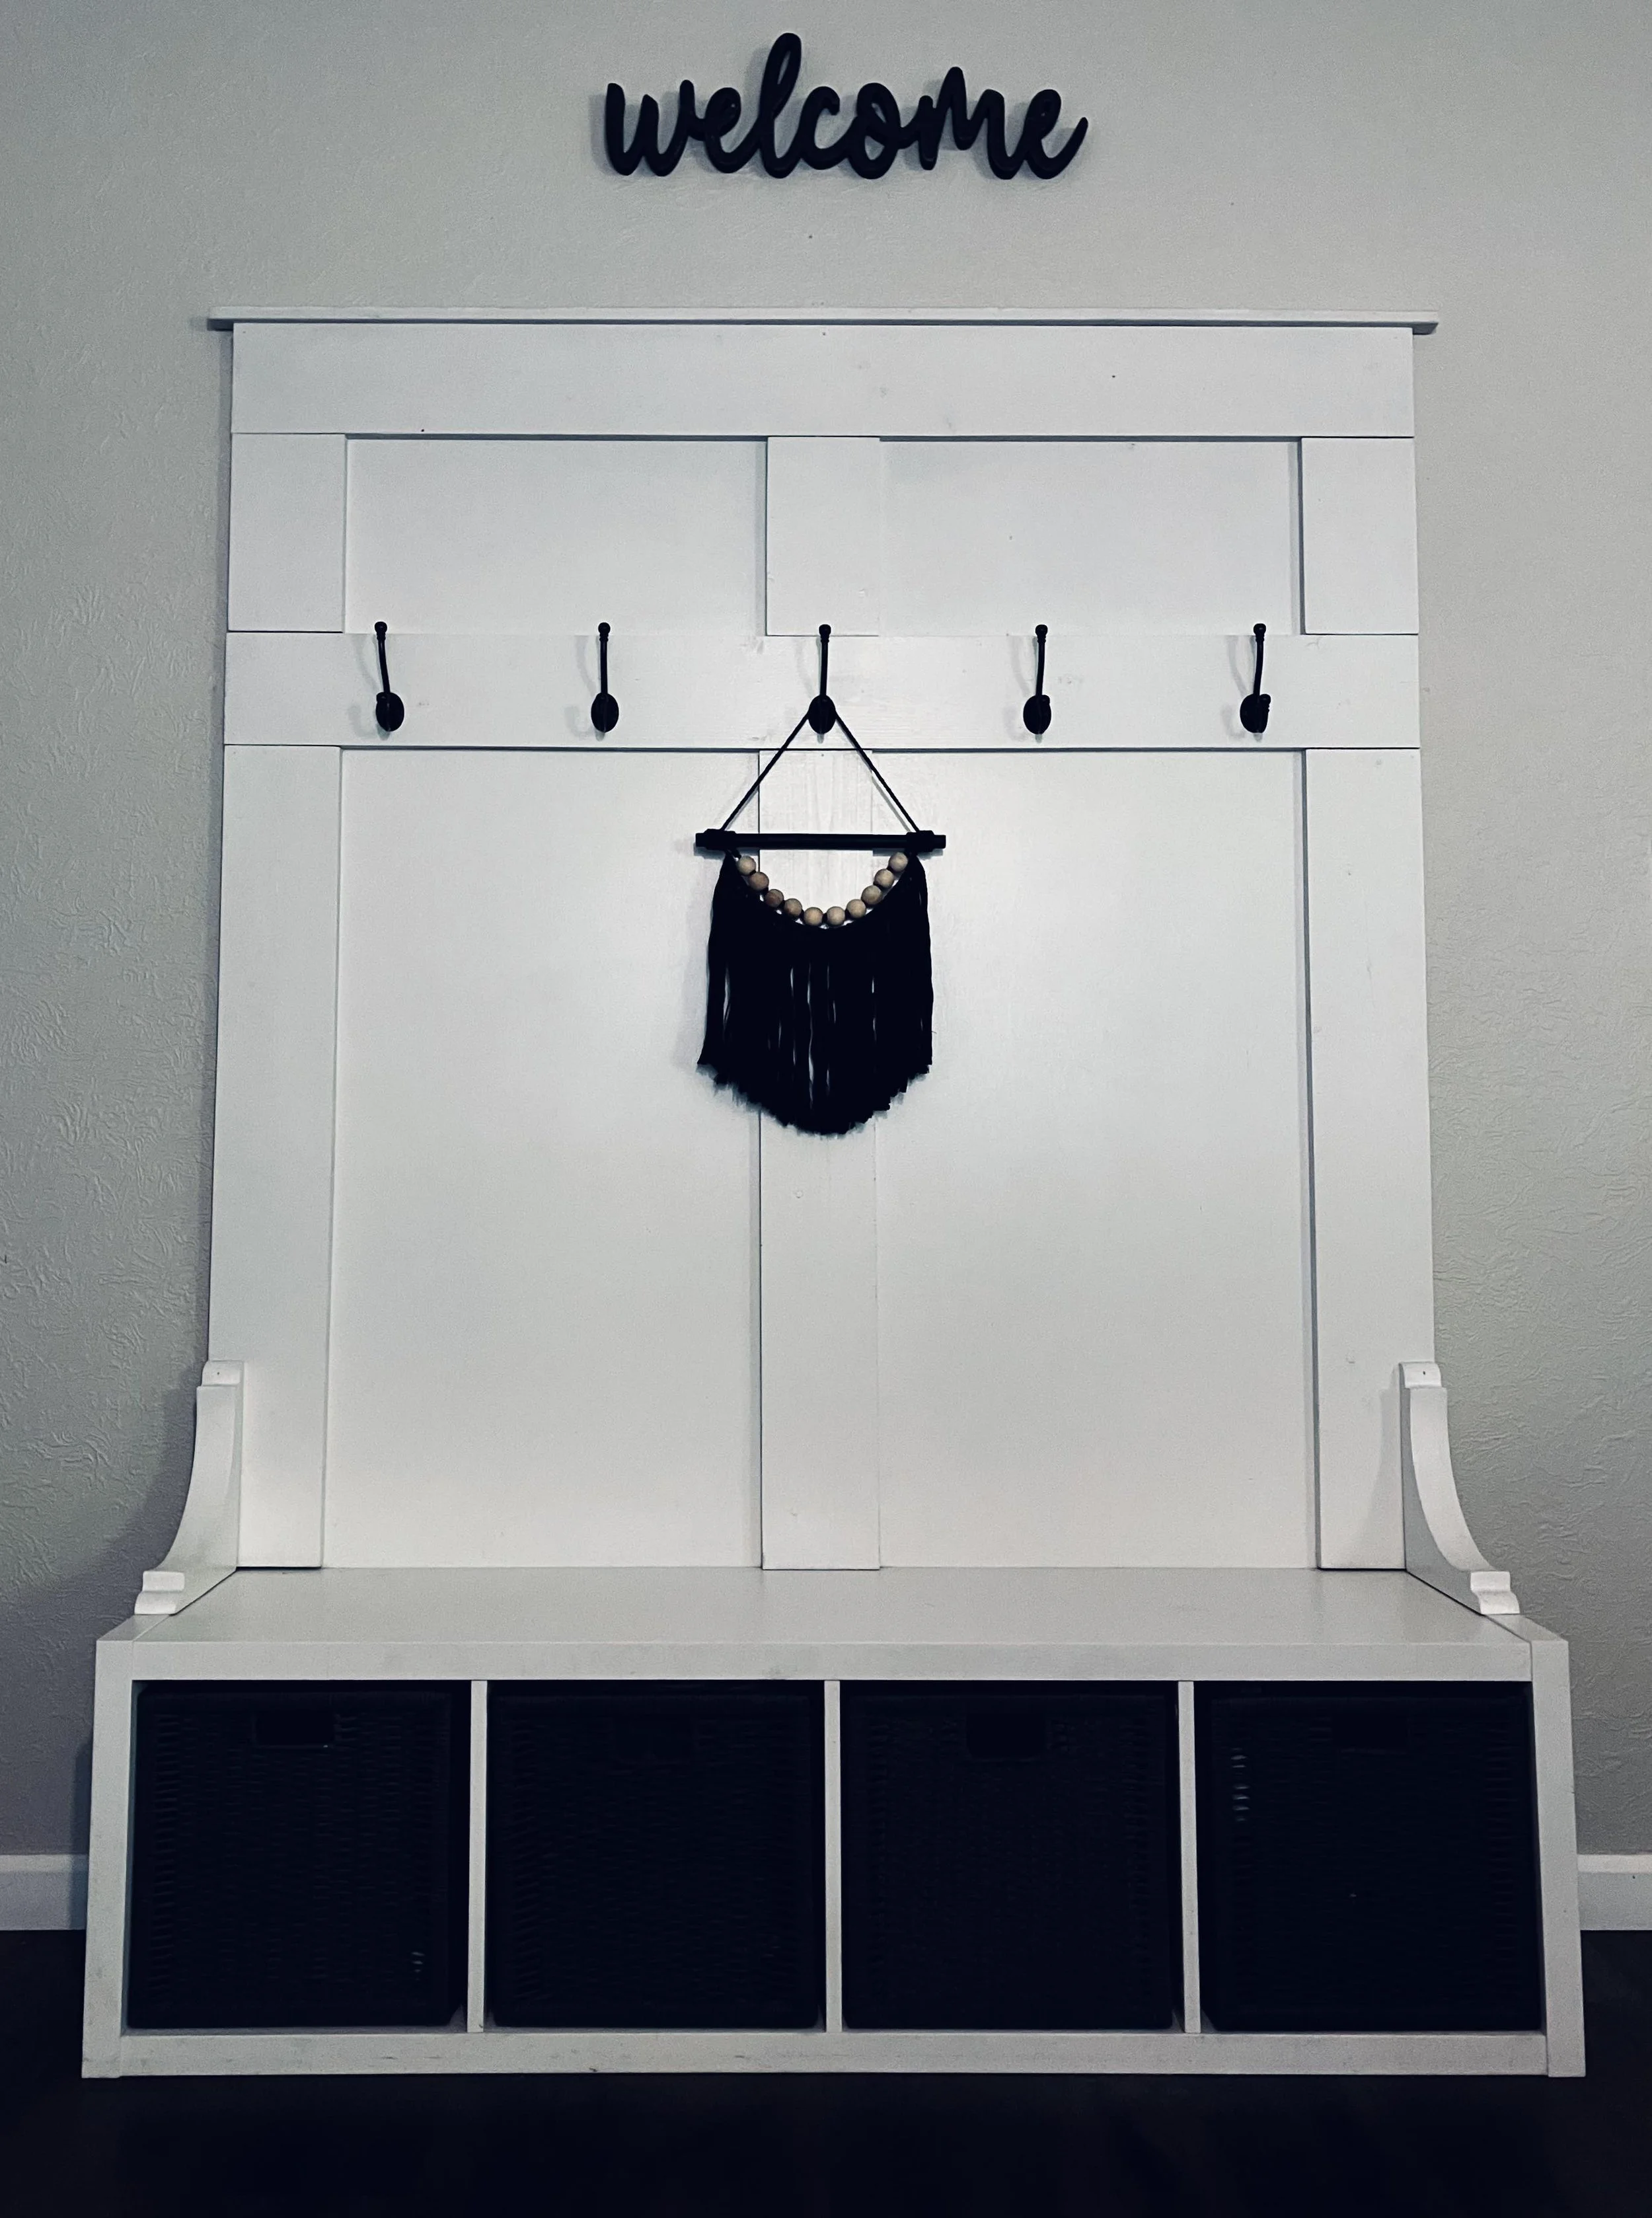

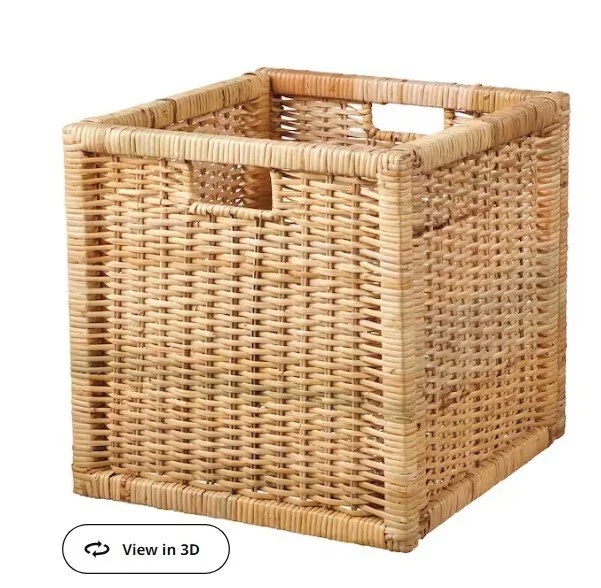
I’ll go ahead and apologize for any missing details since I am writing this so long after the project was done! I assume I got my inspiration online and tried to recreate something similar. I decided to use an Ikea Kallax unit as the base so I didn’t have to try to make that part. I originally wanted black wicker baskets, but the gray was the closest I could find. They are also from Ikea. I noticed while looking for images that they only offer the natural color now (and I’m considering getting those to switch things up!).

I did this project all by myself and I highly recommend having help or building on your wall directly, which I would have done, but I wasn’t ready to attach it to the wall until after the flooring and trim was replaced. I had to build this on the floor and stand it up afterward. Since it was so tall and the plywood so thin, it was flimsy when I had to lift it up. Having someone lifting on the other side would have been much better. I almost broke it being impatient and if you know me, you’re not surprised!
From shelf to hall tree/entry bench:
The list of materials I can remember using (I’m so sorry lol) is below and I’m not going to include exact measurements I used because, again, it’s been awhile, but I will explain where I measured so you can do the same! I also don’t have as many photos of the process as I wish I did.
As you probably know, all Ikea furniture requires assembly. Once that was done (following Ikea’s directions 😉), I looked at the space I wanted my hall tree and decided about how tall I wanted it. It was a completely random measurement as I picked a spot on the wall and decided that would be good and then measured from the floor to that spot.
For the backing, I used ¼” thick sanded plywood underlayment. The Kallax unit was just a little too wide to be able to use one 4’x8’ sheet of plywood, so I had to buy two. I had Home Depot cut them down to half the width of the Kallax unit each so they’d meet in the middle and a piece of trim would cover the seam. It was frustrating and made the project more expensive, but I was able to repurpose the extra plywood into signs.
Because my hall tree was going to be in front of a return vent, I cut out a square in the plywood where it would cover the vent. Once that was cut, I turned everything around so I could access the backside. Yes, this was tricky because nothing was attached, so I held up one piece of the plywood at a time with one hand while lining it up and screwing it into the back of the Kallax with the other. This would have been a good time to have that second set of hands! I would probably do this part the same to attach the plywood to the Kallax without any brackets or screws showing from the front, even though it was awkward and challenging.
At this point, I laid the entire piece down. I eyeballed about how high I wanted my hooks and that’s where I placed one of the horizontal 1x6 boards. The other horizontal board was placed at the top, lining up the edges. I then measured the distance between each horizontal board for the 3 short, vertical 1x6 pieces toward the top. After that, I measured the distance between the top of the Kallax to the bottom of the horizontal board that will have the hooks. Once I had these measured and cut, I laid them out to make sure they would all fit. After that, I glued them all in place. While waiting for the glue to dry, I installed the hooks.

To install the hooks, I measured the length of the 1x6 board they would go on and found the halfway mark. I also marked the halfway point from top to bottom. I attached the first hook by centering it on the X that was created by marking the horizontal and vertical halfway points. To figure out where to put the remaining four hooks, I took the measurement of the halfway point to one edge and divided it by three. I measured and marked that number (example: if it was 24 inches to the halfway point and that divided by 3 was 8 inches, I measured and marked every 8” from the middle point to the edge on each side). That left 2 marks on each side and after measuring the vertical halfway points, that is where I put each remaining hook.
After waiting as long as I could for the glue to dry (remember that impatience I mentioned earlier?), I picked the entire unit up to put screws in the back to hold the 1x6 boards in place. This is where it almost all fell apart and broke again. Doing this over, I would put the Kallax with plywood attached up against the wall and just use my nail gun to nail all the trim in place, into the plywood and into the wall. I got lucky that everything was straight by lining up the edges when I glued them. If I made it on the wall directly, I would use a level to ensure everything is straight.
After all 1x6 boards were attached, I pushed the whole unit up against the wall in its place. I then put the 1x2 board on the very top and decided how much I wanted overhanging on each side. I measured and cut that and then screwed it in place. Then, I attached the corbels to each edge of the top of the Kallax and up against the 1x6 side trim pieces to create an arm look to the bench.
Next up was paint! I removed the hooks and painted everything white. Once that was dry, I reinstalled the hooks and it was done! It would probably look nicer if I caulked all the seams and painted another coat, but I probably won’t end up doing that.
Lastly, decoration! I still haven’t found décor I absolutely love for this bench after 5 years (in my defense, I don’t spend a lot of time thinking about decorating this bench lol). During the farmhouse trend, I had a boxwood wreath and ruffle pillows (I still love ruffles!). I just bought the black boho macrame piece from Hobby Lobby, but I don’t really love it like I thought I might. I’m thinking I would like a hanging basket full of string of pearls (hence why I have those added to my Amazon storefront!) or maybe a pompous grass wreath!


Let me know what you think or if you have any questions! I’m so sorry if any of this is confusing without more details!
Materials
Ikea Kallax Unit
(4) Ikea Branas Baskets
(2) 4x8 1/4” sanded plywood (cut to desired height by half the width of the Kallax unit)
(5) 1x6x6 common boards
1x2x6 common board
(2) corbels
(5) hooks
Nails
Screws
Paint
Caulk (if you choose)
Tools
Drill/screwdriver
Nail gun
Wood glue
Tape Measure
Level
Pencil for marking where to place the hooks
Paintbrush